How do I wire my Pump Start Relay?
Our relay is an “open circuit” electric switch that is used to connect high voltage (120/240 VAC) from a high voltage source to a pump or other high voltage circuit. The relay/switch is operated (turned on) by connecting a 24 VAC source to the two blue wires connected to the relay coil.
Most timers do not provide sufficient voltage or current to operate a 120 vac or 240 vac pump so a Pump Start Relay is required for a timer to operate a pump.
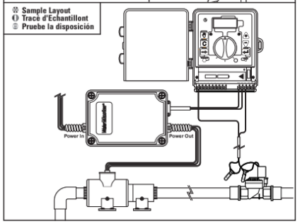
The Pump Start Relay should be mounted at least 5’ away from the timer. The timer should be mounted at least 12’ away from the pump. The relay can be mounted outdoors but to help prevent overheating it should not be mounted in direct sunlight.
The Pump Start Relay can be used to operate a 120 VAC or 240 VAC pump as long as the current does not exceed 25 amps. If a larger pump (2 HP) is connected to 120 VAC instead of 240 VAC it could pull more than the 25 amp rating of the Pump Start Relay. This could cause the relay to overheat and cause physical damage to the relay.

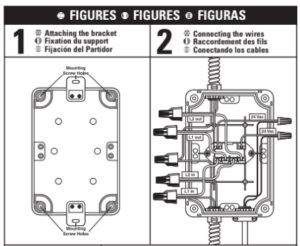
The two blue wires are labeled 24 vac. One wire will connect to the PUMP/MV terminal on the timer. The other wire will connect to the COMMON/COM terminal. Wire size to connect the relay to the timer will normally be 18 AWG. The relay can be located up to 800’ away from the timer using 18 AWG wire.
The two red wires are labeled L1 IN and L2 IN. These wires will connect to the wires coming from the power source (120 or 240 VAC). Power wires from the power source and to the pump should be 12 AWG with a temperature rating of 55⁰.
The two black wires are labeled L1 OUT and L2 OUT. These wires will connect to the pump (120 or 240 VAC) wires.
The ground wires from the power source and the pump can be connected together in the Pump Start Relay box using a wire nut.

Tags: core, pump, Voltage, wiring