Programming the Advanced Hose Faucet Timer
Look here for more information on programming advanced multi-port hose faucet timers such as 24713, 56544, and 56545.
Advanced Programming
Advanced hose faucet timers allow you to set multiple start times for your stations(hose timer outlets) to run. First, you’ll decide how long each station should water. Then, you’ll set your start times and add stations to them so that they water, one after another, at that time. The start times, run times, and groupings are good information to have ahead of time.
Initial set up: Time and Day
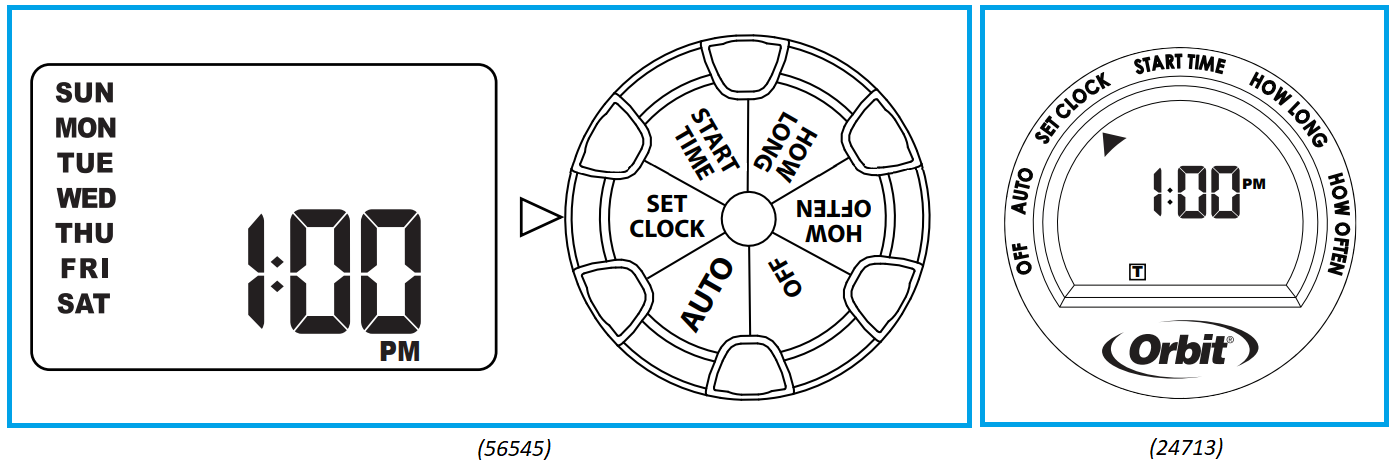
Turn your dial to Set Clock. the days of the week and the default time should be displayed if this is your first time setting up your timer. If the time is already correct, feel free to skip this part.

Use + and – to change the time. Time advances faster as you hold the button and usually you must progress the clock to get to AM or PM as desired.
Use the arrow to move to the day selection. Use + and – to select the current day of the week.
To save, turn the dial to another option.
Set your start times:
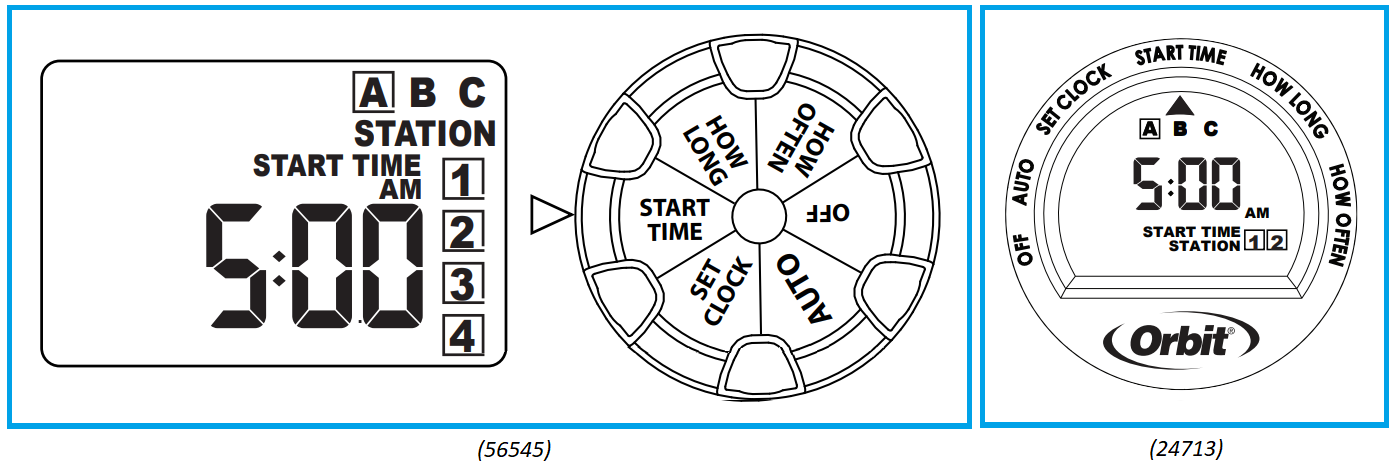
Turn your dial to Start Time. You should see your start times (A B C), your stations (1-4 or 1-2) and the time. Displays and dials vary by model, but here are two examples:

First, set start time A using the + and – buttons on your timer. Note the AM or PM and that holding the button down will usually make the time progress faster.
Next, press the station button to select station 1. If you would like to have station 1 water at that time, ensure there is a box around that station. If there isn’t a box, press the + button to add the station to that start time and put a box around the station. If you would like to remove the station from the start time, press the – button. Press the station button to select a different station to add(+) or remove(-) from the start time.
Press the arrow button to select a different start time (A B C). Then, you can set your second start time with + and – and use the station button to add(+) and remove(-) stations. If you need to go back to edit a start time, use the arrow button to loop around and then the + and – buttons to change it.
Your timer will water each station with a box at the times you set, one after another. In the example images above, all stations will water at 5 am on either timer as a part of start time A.
Set your Run Time/How Long
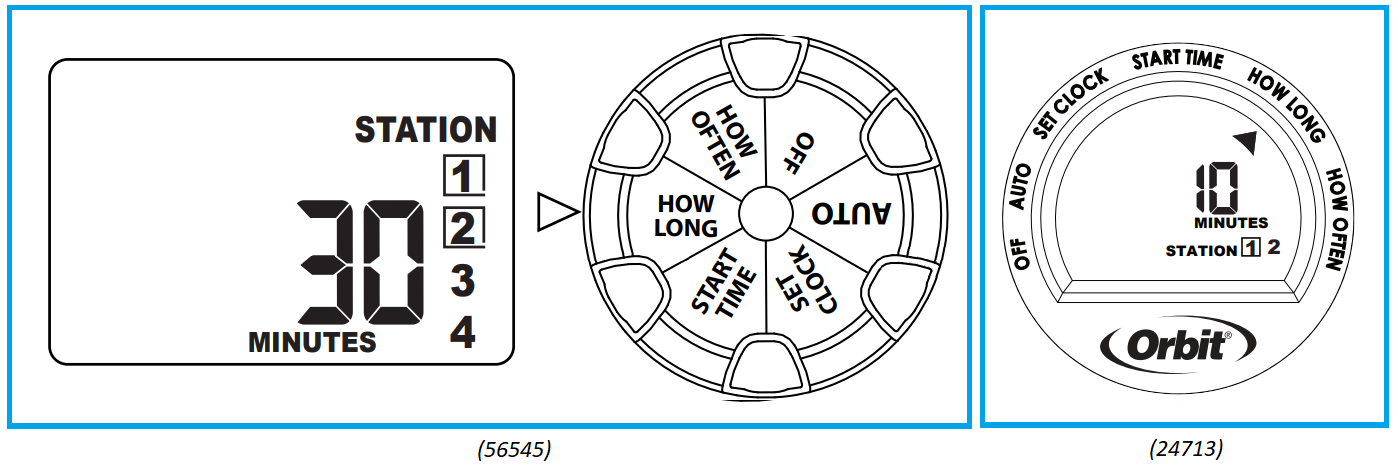
Turn your dal to How Long. You should see your stations and the time in minutes the station will run. You can set one run time per station on advanced hose timers, meaning whenever it is added to a start time, it will run for that amount.

Use the + and – buttons to adjust the run time. Use the station button to change stations to adjust the run time for your other station(s).
Set your interval/How Often
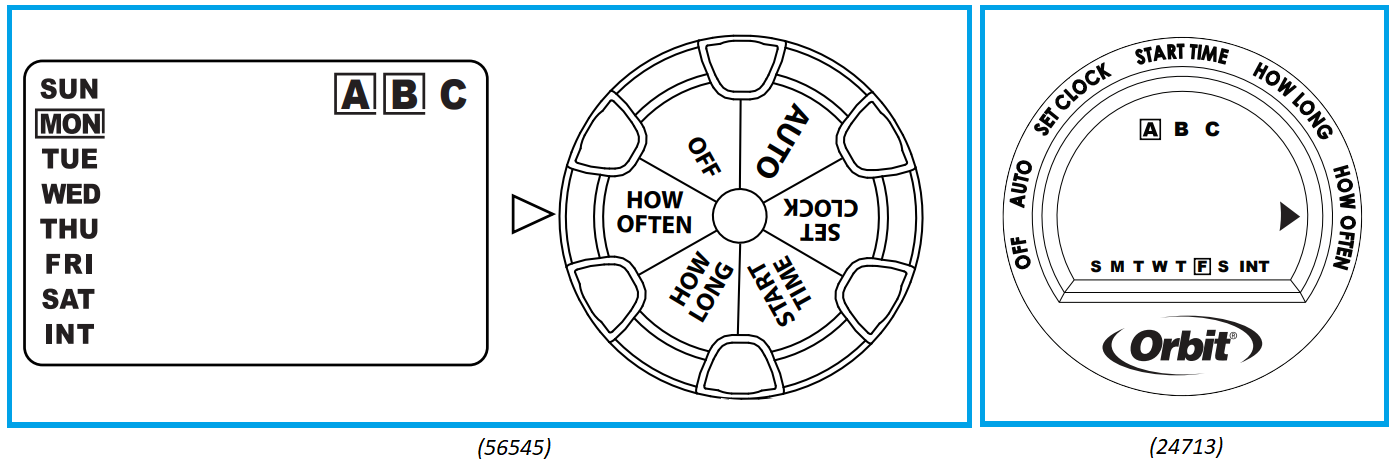
Turn your dial to How Often. You should see your start times (A B C) and the days of the week followed by INT. Here you can choose to have the start time water on any combination of days of the week or an interval from hours to days.

First, use the arrow button to select which start time you are setting the interval for.
Next, use the + or – button to move the cursor down to the day/interval selection area.
Then, you can use the arrow to move through the days and interval section. To set the start time to water on a day of the week, press the + button when you have selected that day and do the same for any other days you wish to water on. Alternatively, to water on an interval, press the arrow until you have selected INT and press the + or – buttons to select your interval times. Many timers allow you to select intervals of hours, some as low as every 1 hour, then up in increments to multiple days. The options will vary by model. As you select days or an interval time, a box will appear around the start time. A selection must be made and there must be a box around the start time letter for automatic watering.
If you wish to program another start time’s watering frequency, you can turn the dial to another selection and then back to How Often. From there, use the arrow to select another start time letter and the + or – button to move the cursor to select your days or interval.
Finally, turn your dial to Auto and your program has been set! If you selected an interval, your interval will start at the next start time on most models. Interval periods of under 1 day may start sooner. Some models will restart their interval when the timer is turned to Off. If you experience this, try moving the dial in the opposite direction so it does not pass Off on the way to Auto.
A Note about 58911, the complete yard watering kit.
This timer also uses multiple start times, but it does not allow you to select which stations will water at each start time. It also only allows for one frequency setting in How Often. All start times will water on the days or at the interval that is programmed. All stations will water, one after the other, at each start time.
Back to Support pageTags: 2-port, 24713, 4-port, 56544, 56545, advanced, faucet timer, hose-faucet, hose-timer, programmingtimer