How To Program Your XR Indoor/Outdoor Smart Timer
Need to program your timer but you’re not sure where to start? Let’s begin.
What is the purpose of the A, B, C, and D programs?
The different programs would be used if you have certain stations that need to run separately from the rest of your stations. For example; Your grass may need to be watered every other day, but you also have a drip system that needs to be watered once a week. You would use the different programs to make your drip system water less often than your lawn. Keep in mind, your timer is limited to these 4 programs being active at once, there is no way to add more than 4 active programs.
When can you set up custom programs?
When going through the initial pairing process, your app will offer to take you through this process. If you chose to do this later, you will first need to set up your zones in your controller.
Setting Up Zones
In the app, use the Navigation bar at the bottom to navigate to the “Zones” page.
- Tap “Edit”.
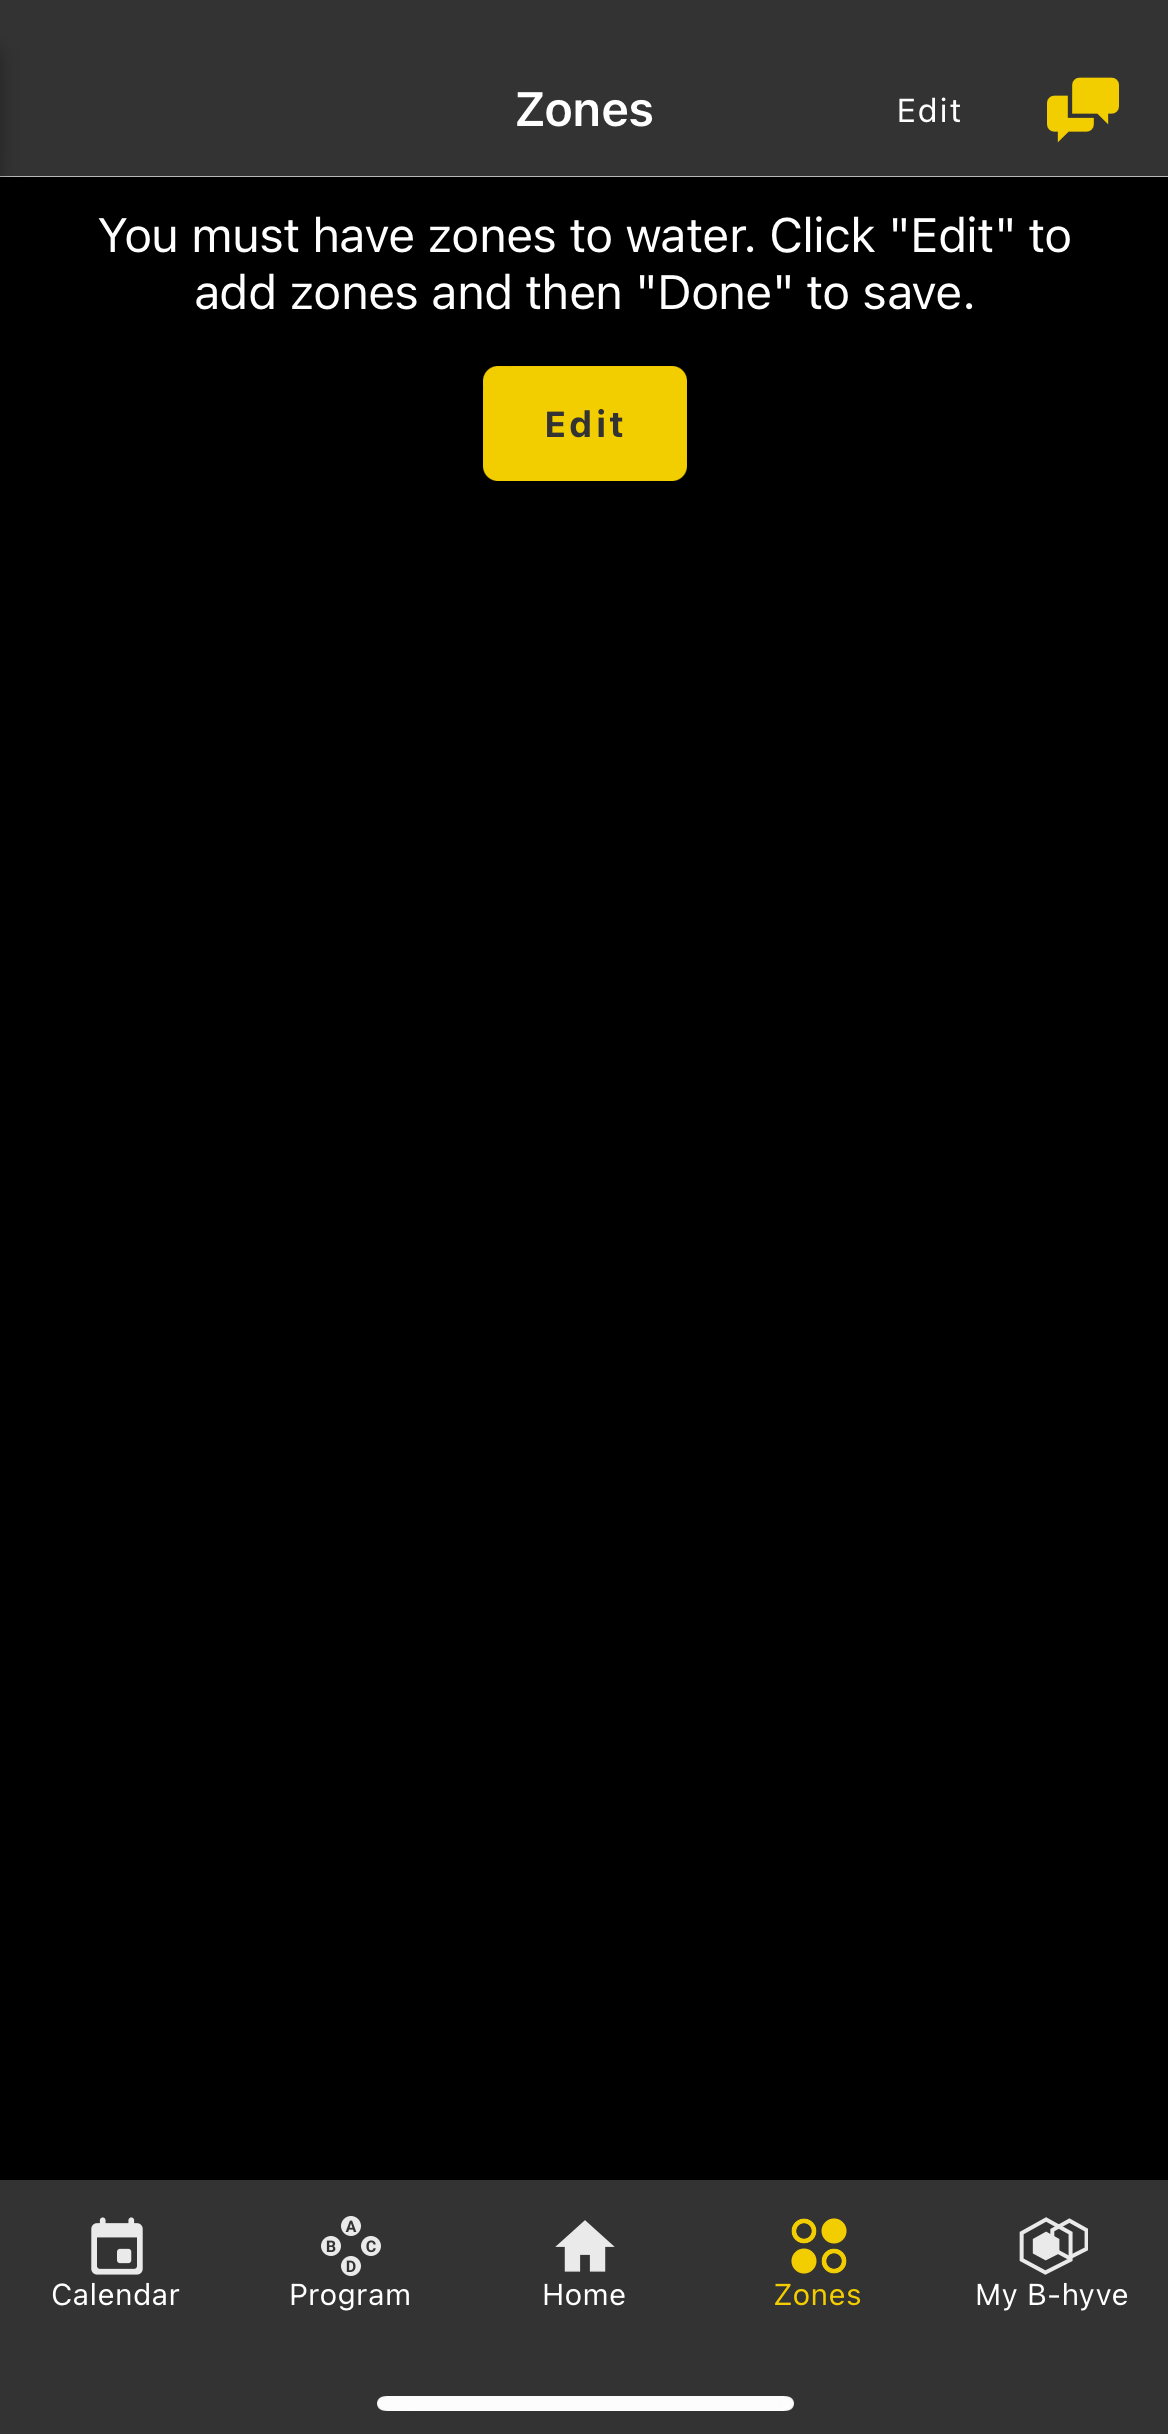
- Press the green + sign to add a zone. Do this for each zone you have wired to your timer. Note: If you’re not sure how many zones you have, you can check on the timer by opening the swing panel and checking which terminals you have wires going to
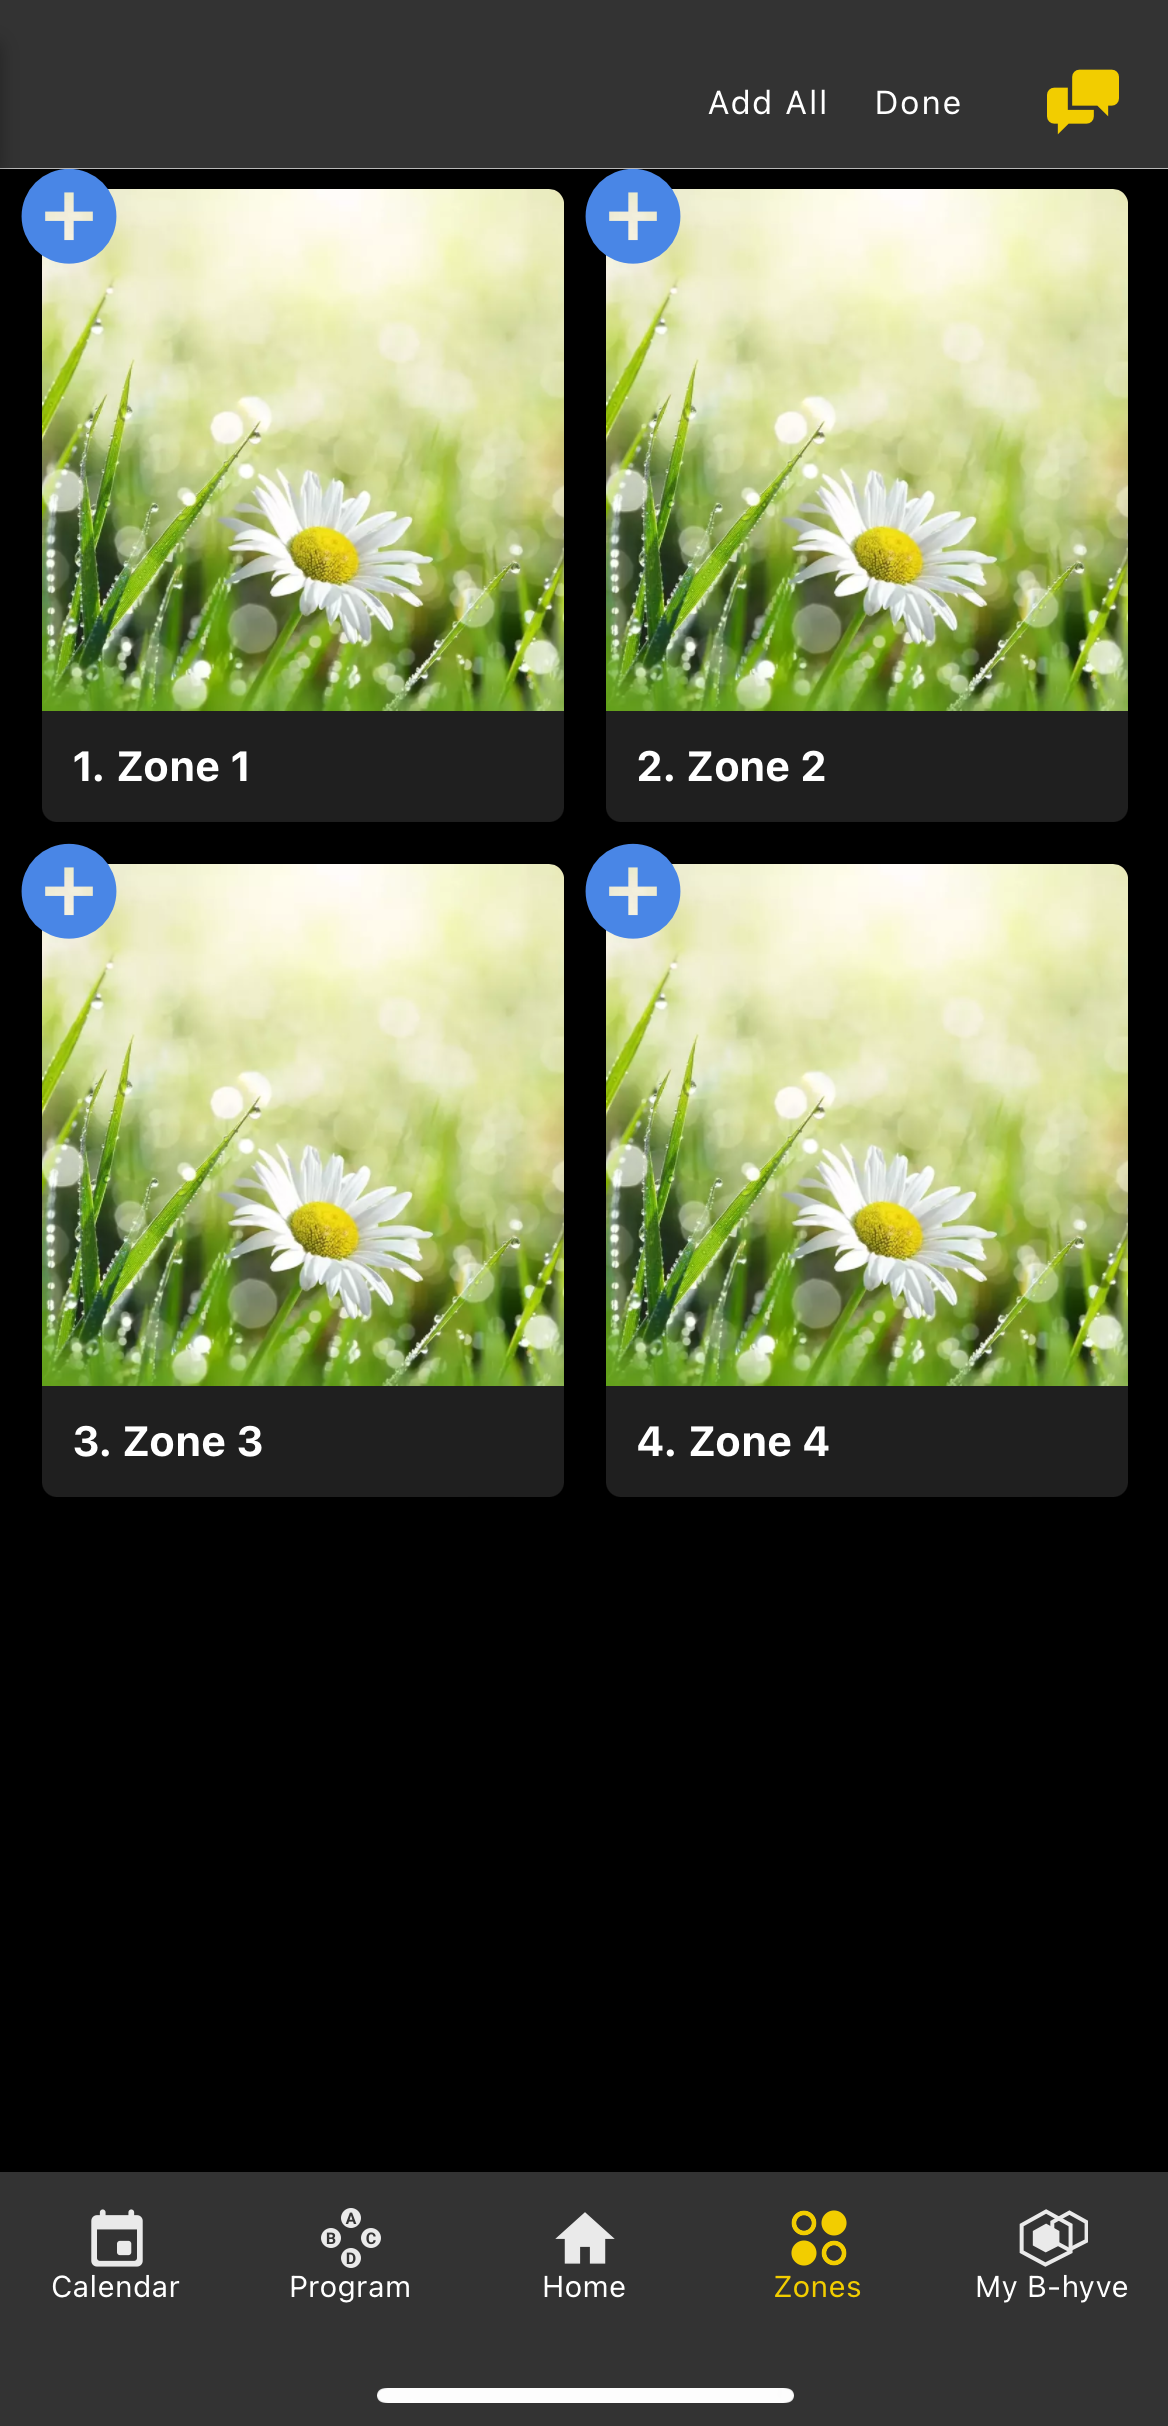
- Once you have selected each zone, press “Done” in the top right corner.
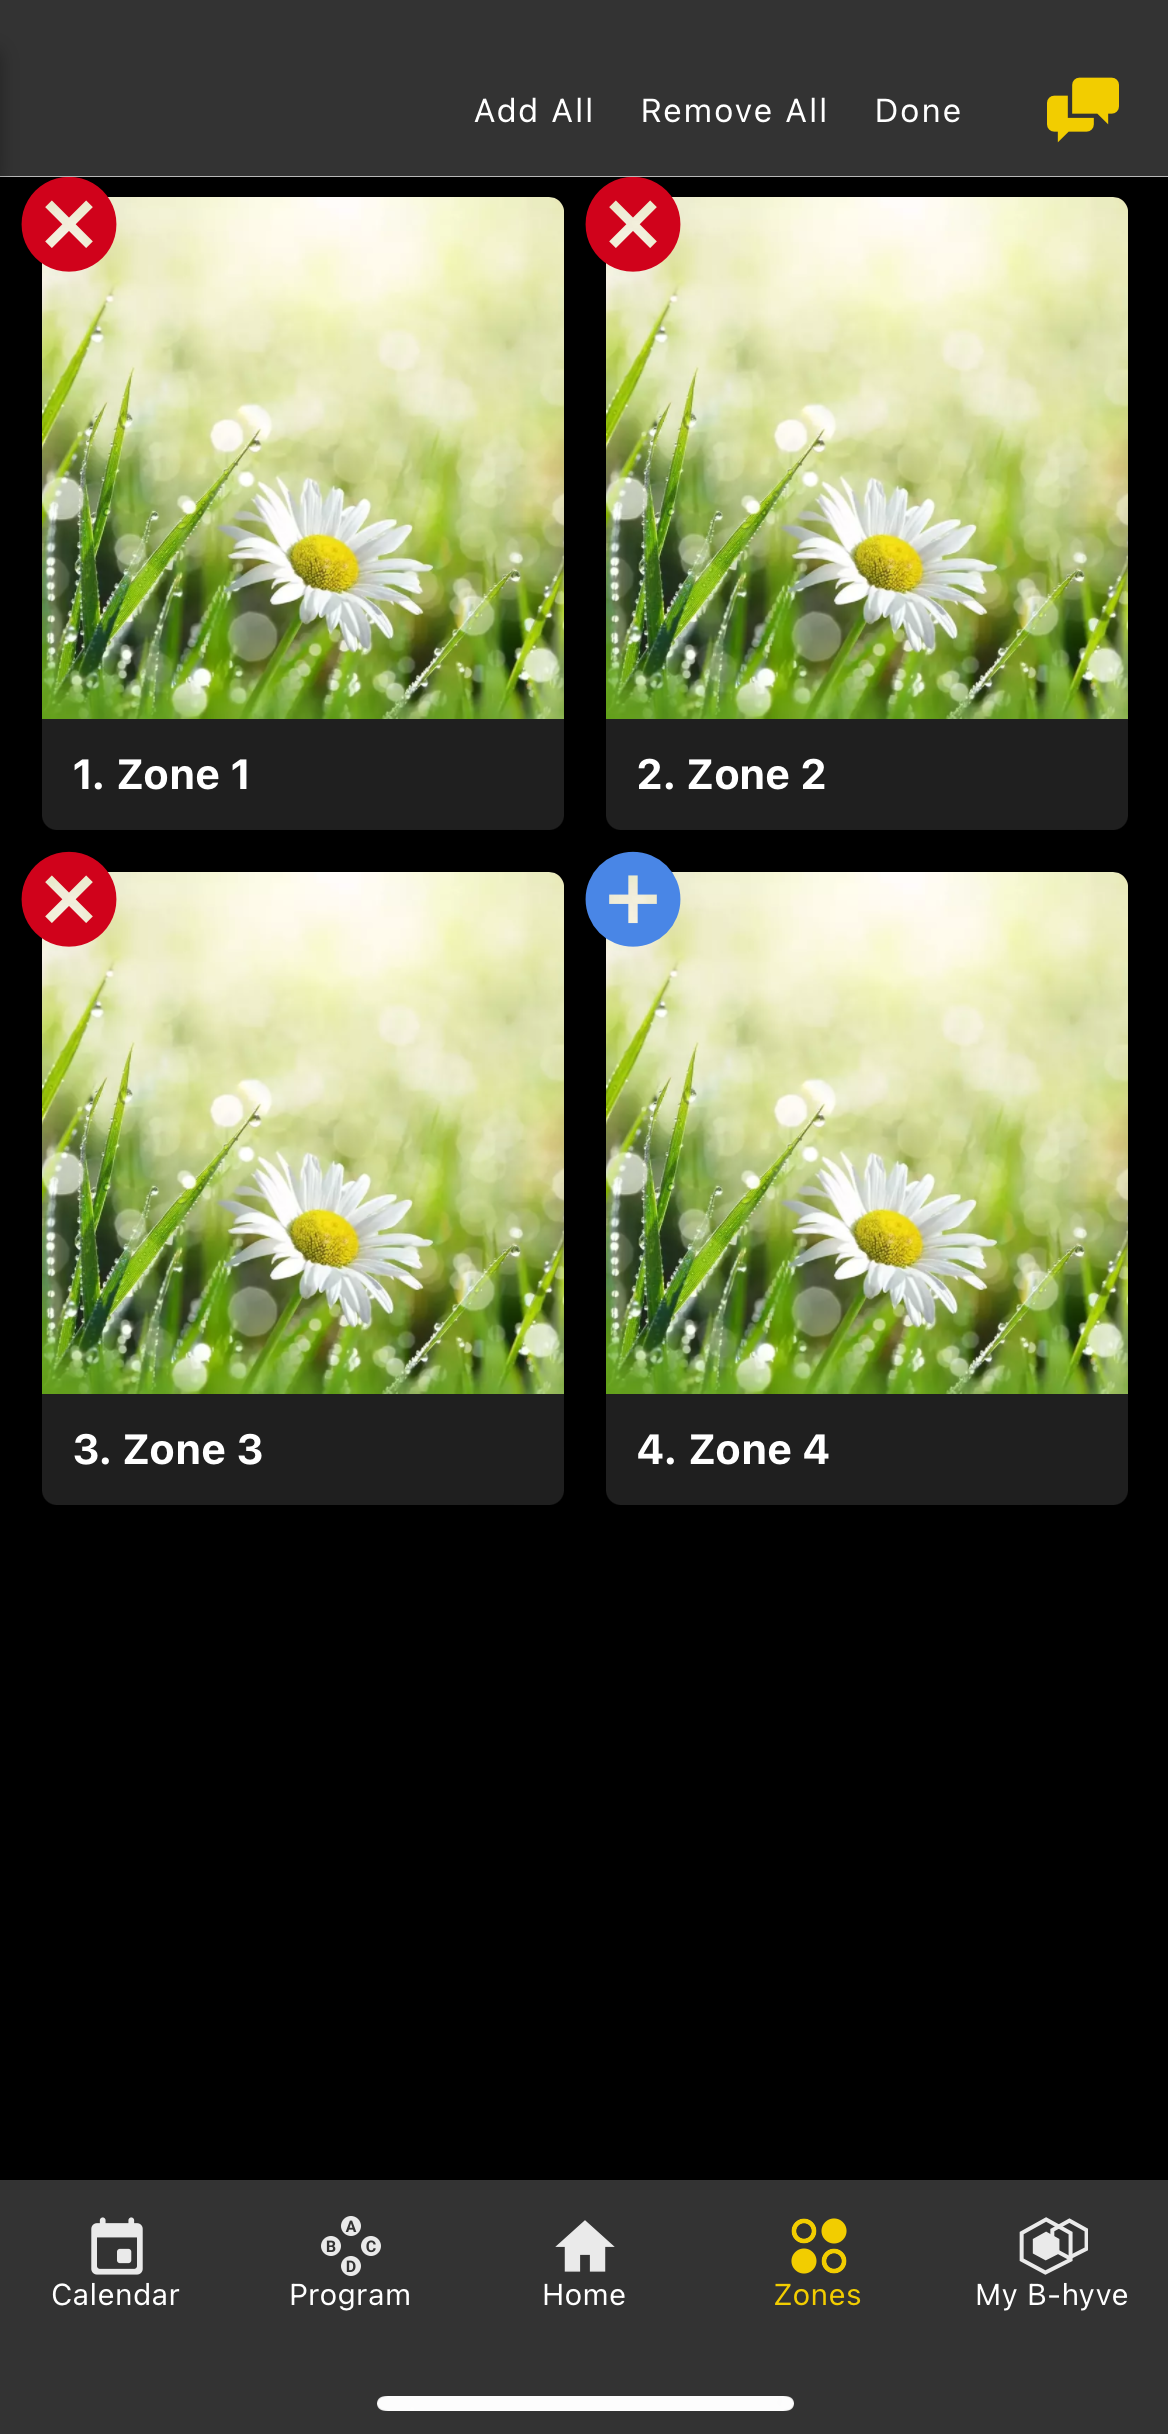
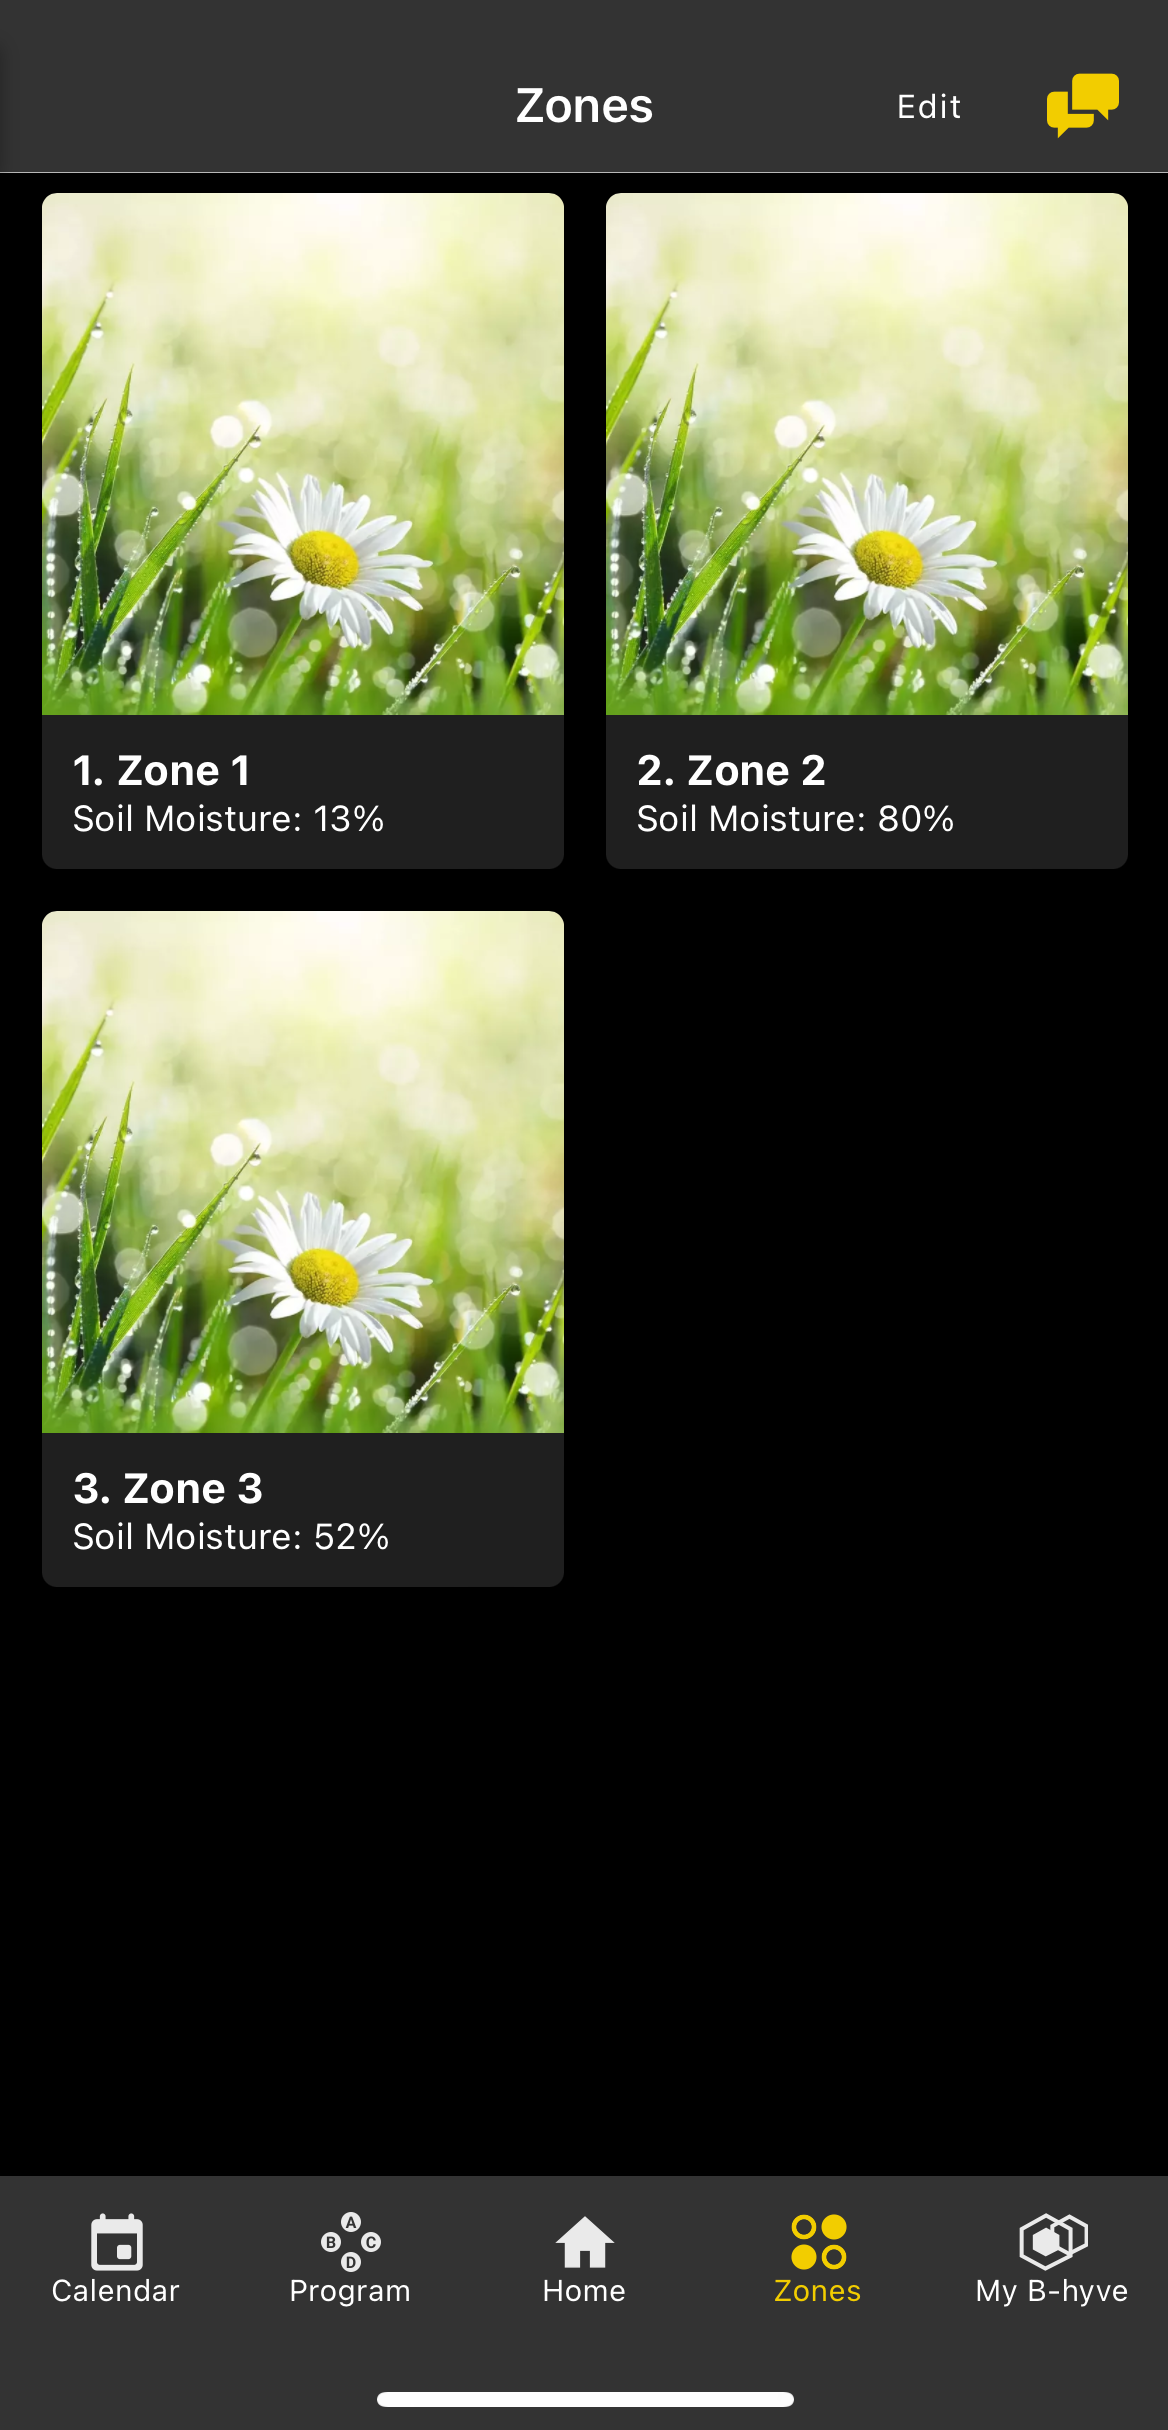
- Now that you have your zones set up, we can begin your custom program.
Setting Up Custom Watering
Custom programs can be found from any screen with the bottom navigation bar. Tap the “Programs” navigation button.
You’ll now see the programs screen with four empty program slots (A, B, C, & D) or any saved custom programs if previously set. Press “Tap to set” to begin creating your custom programs.
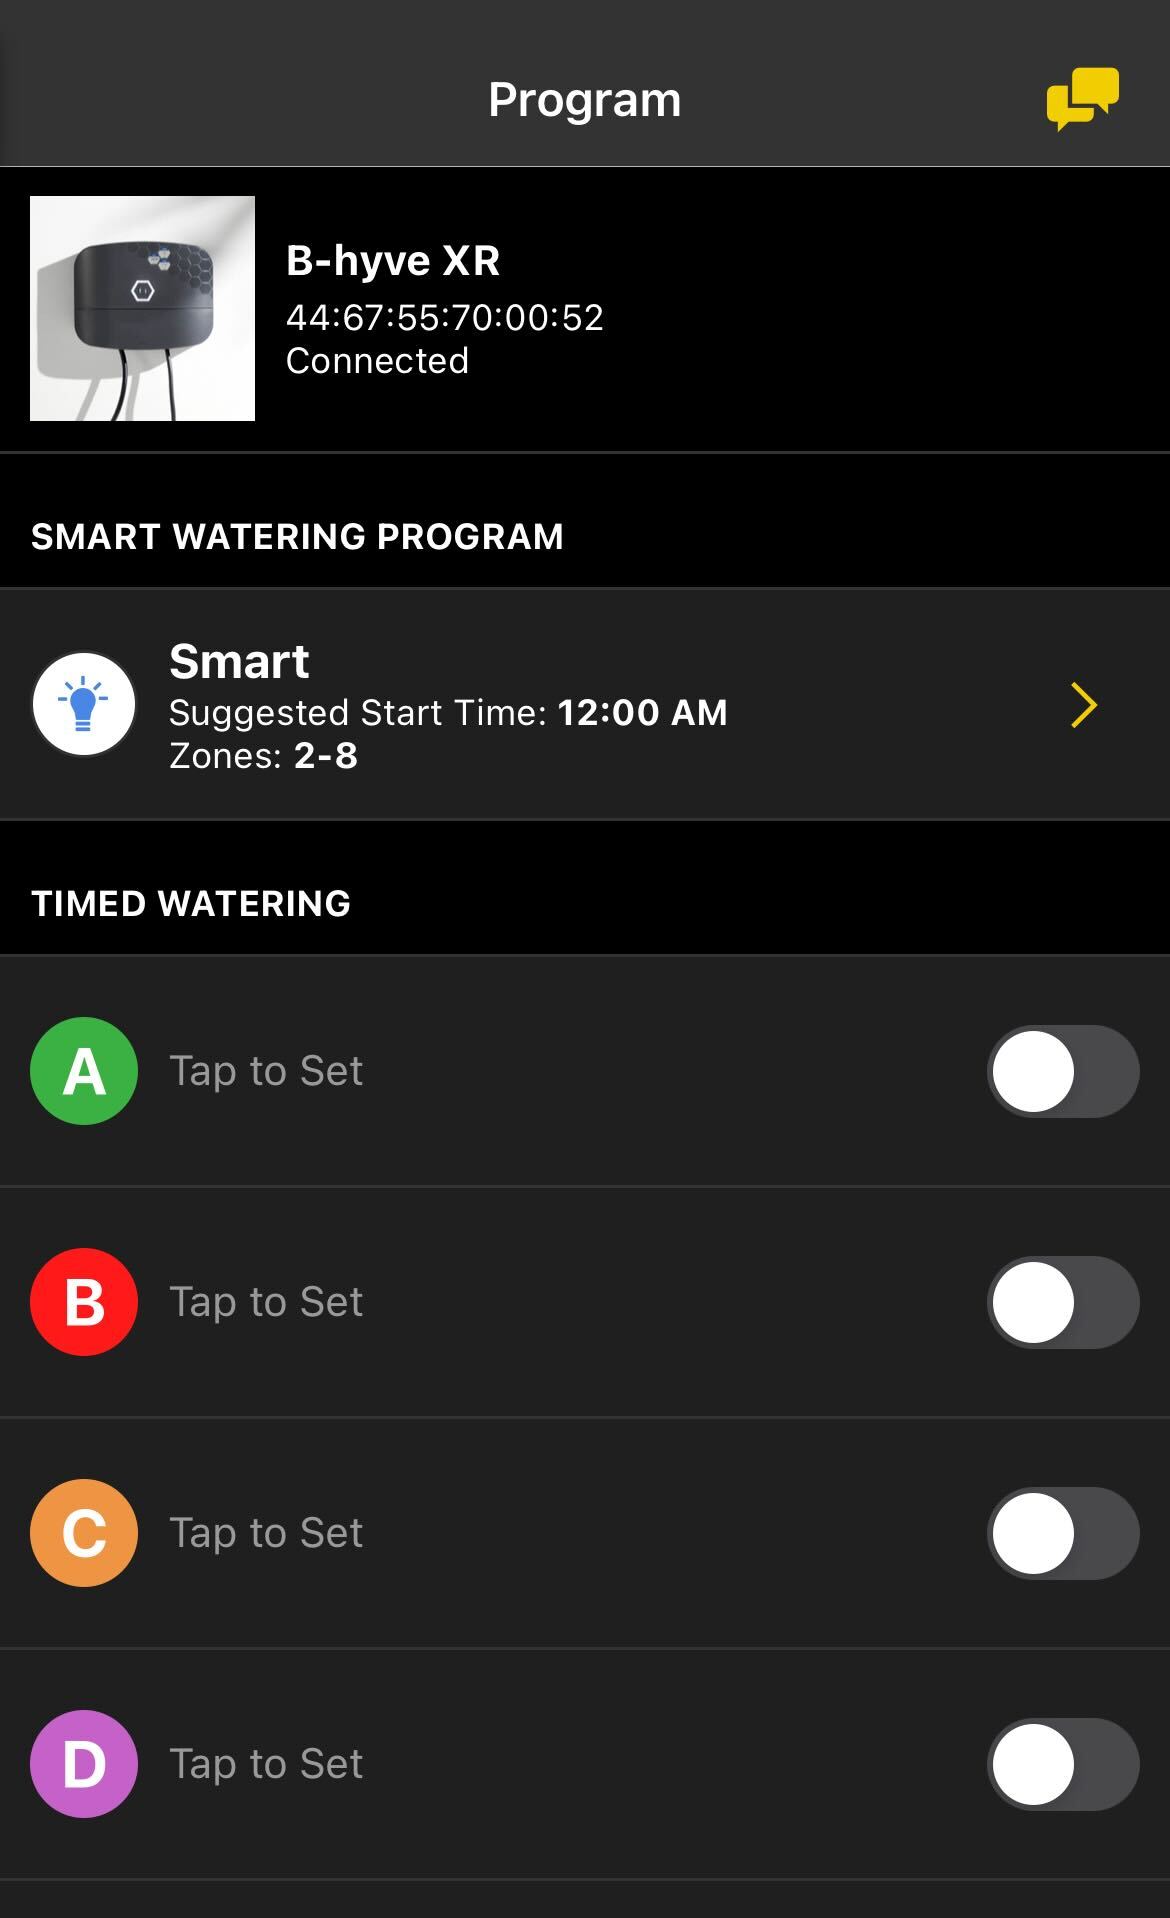
I’m going to create a program to run every Monday, Wednesday, and Friday. I have 3 stations, and they can all run for 10 minutes at 6 am. This is just an example program and is not a recommended program for your system.
You will now see the Custom Program screen; you will first need to name the program. Enter the desired name, then press “Done”
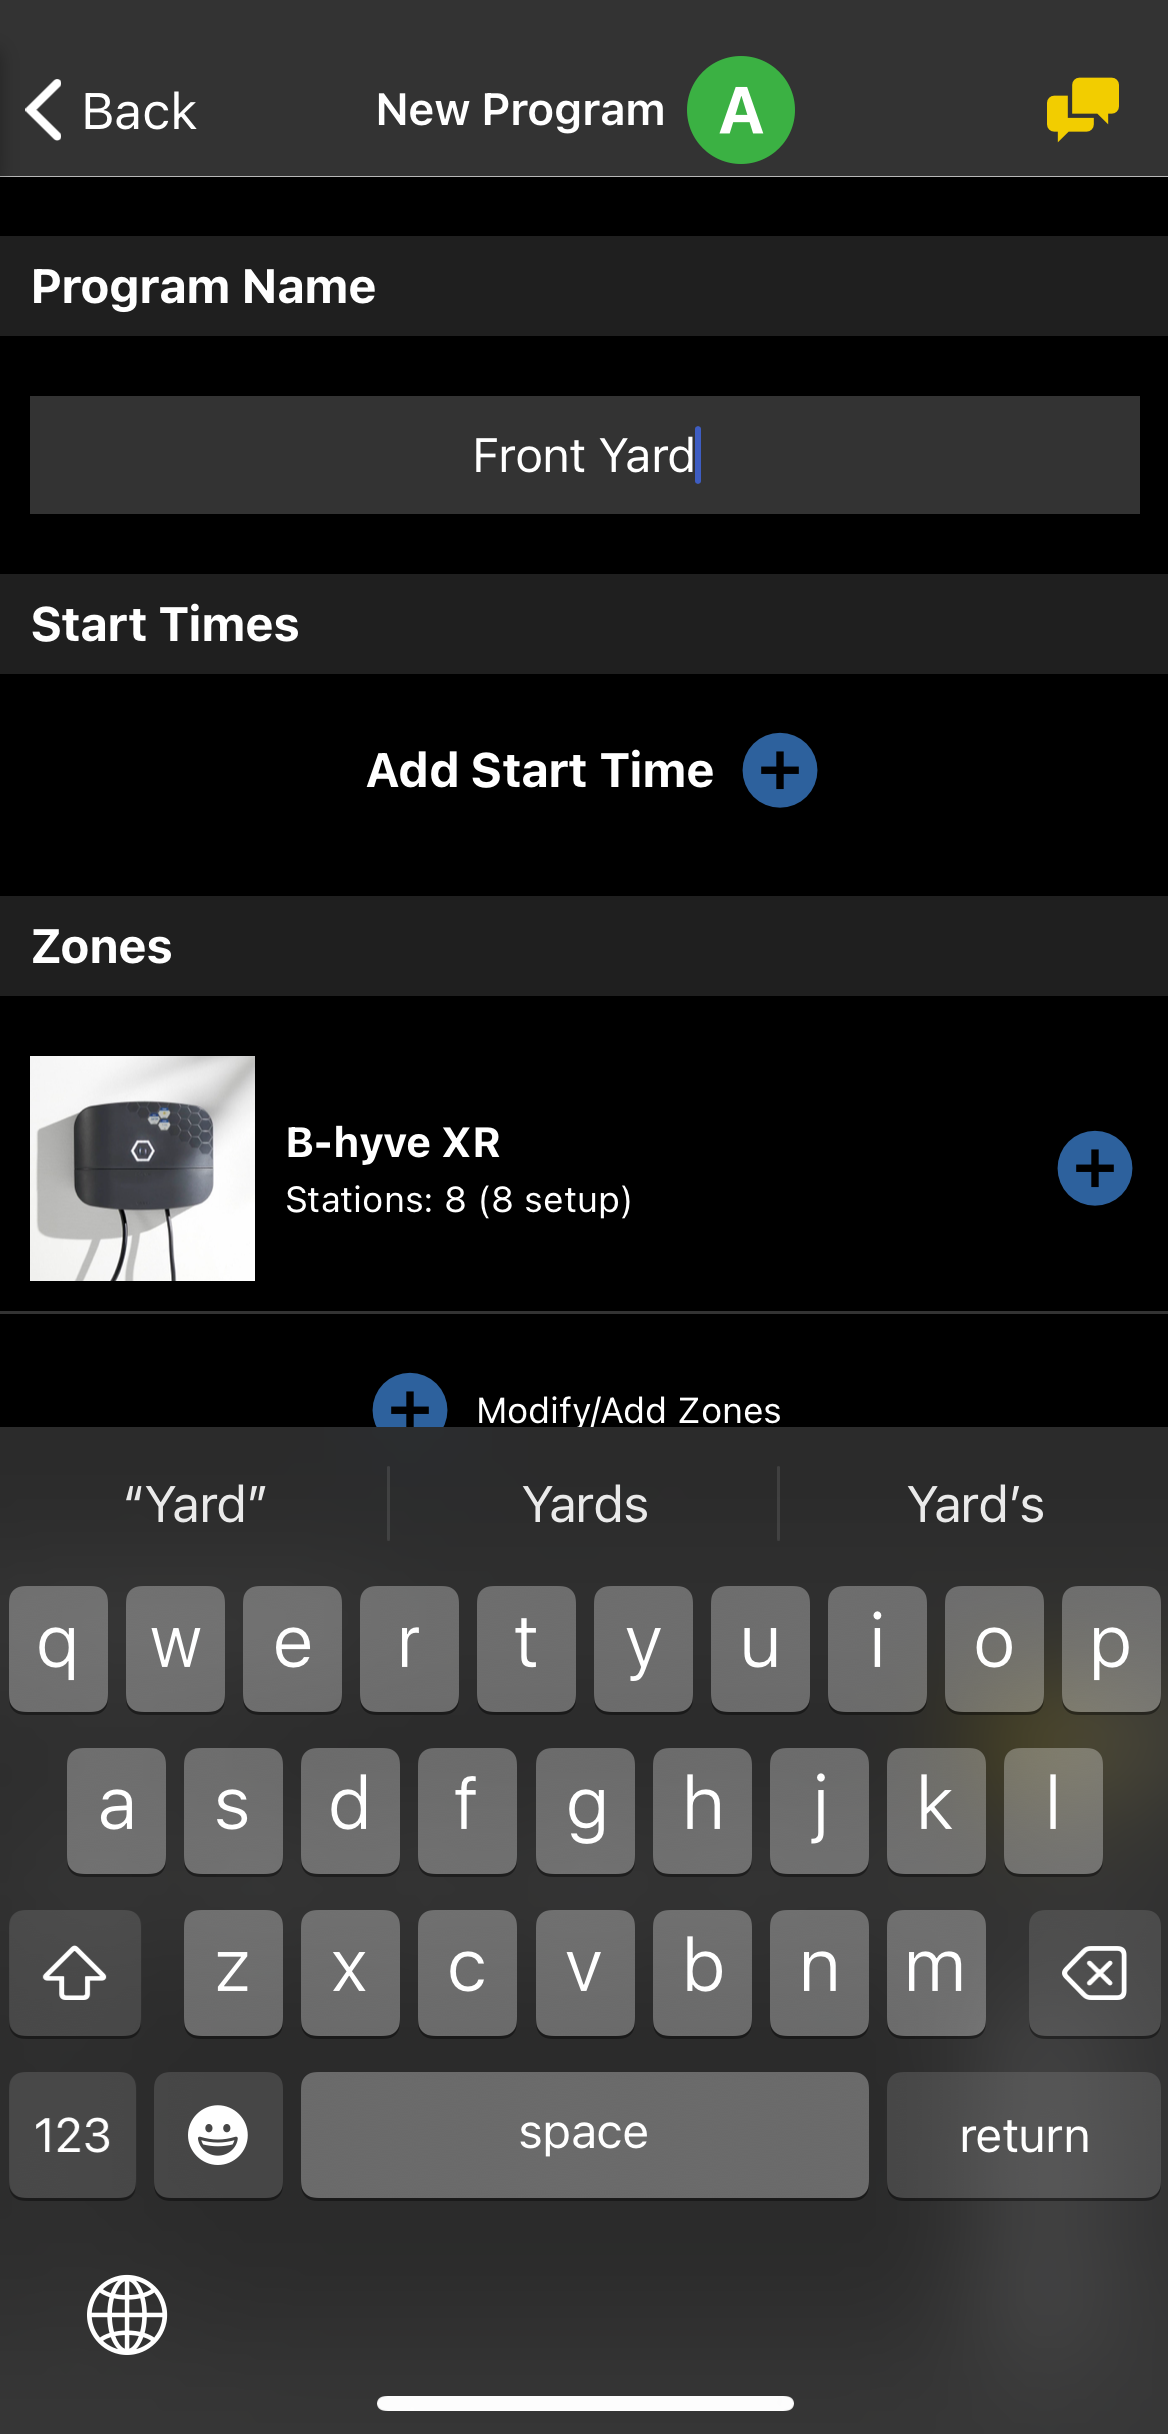
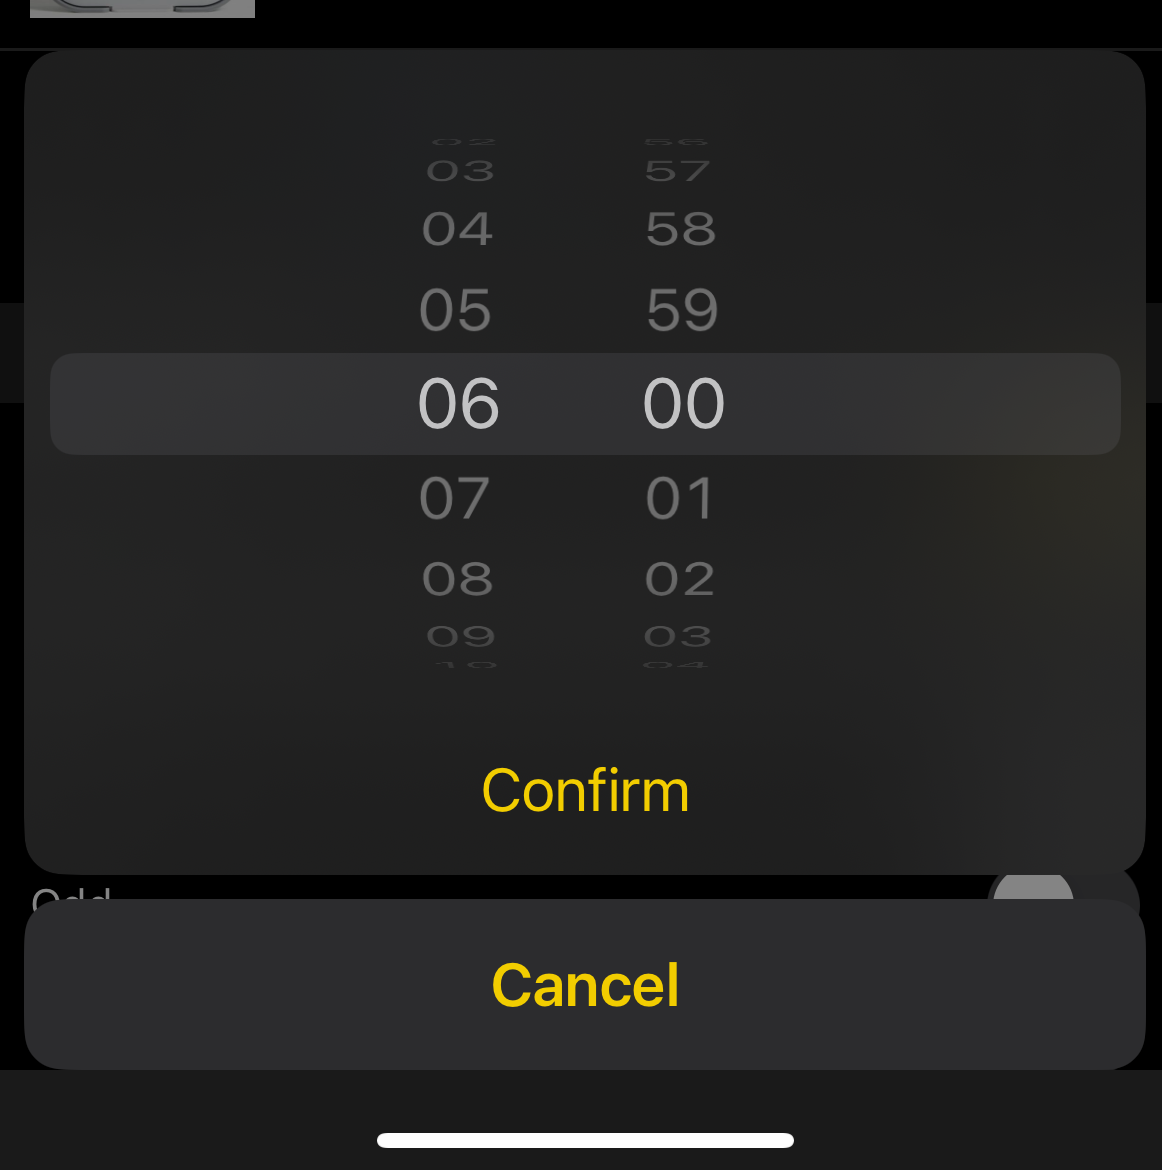
Now you will set a start time. Press the “Add Another Start Time” button and select the desired start time. Hint: The hours and minutes can be selected then set by selecting a time on the clock. Press “OK” to continue and return to custom programs screen. Additional start times can be set by following the same steps.
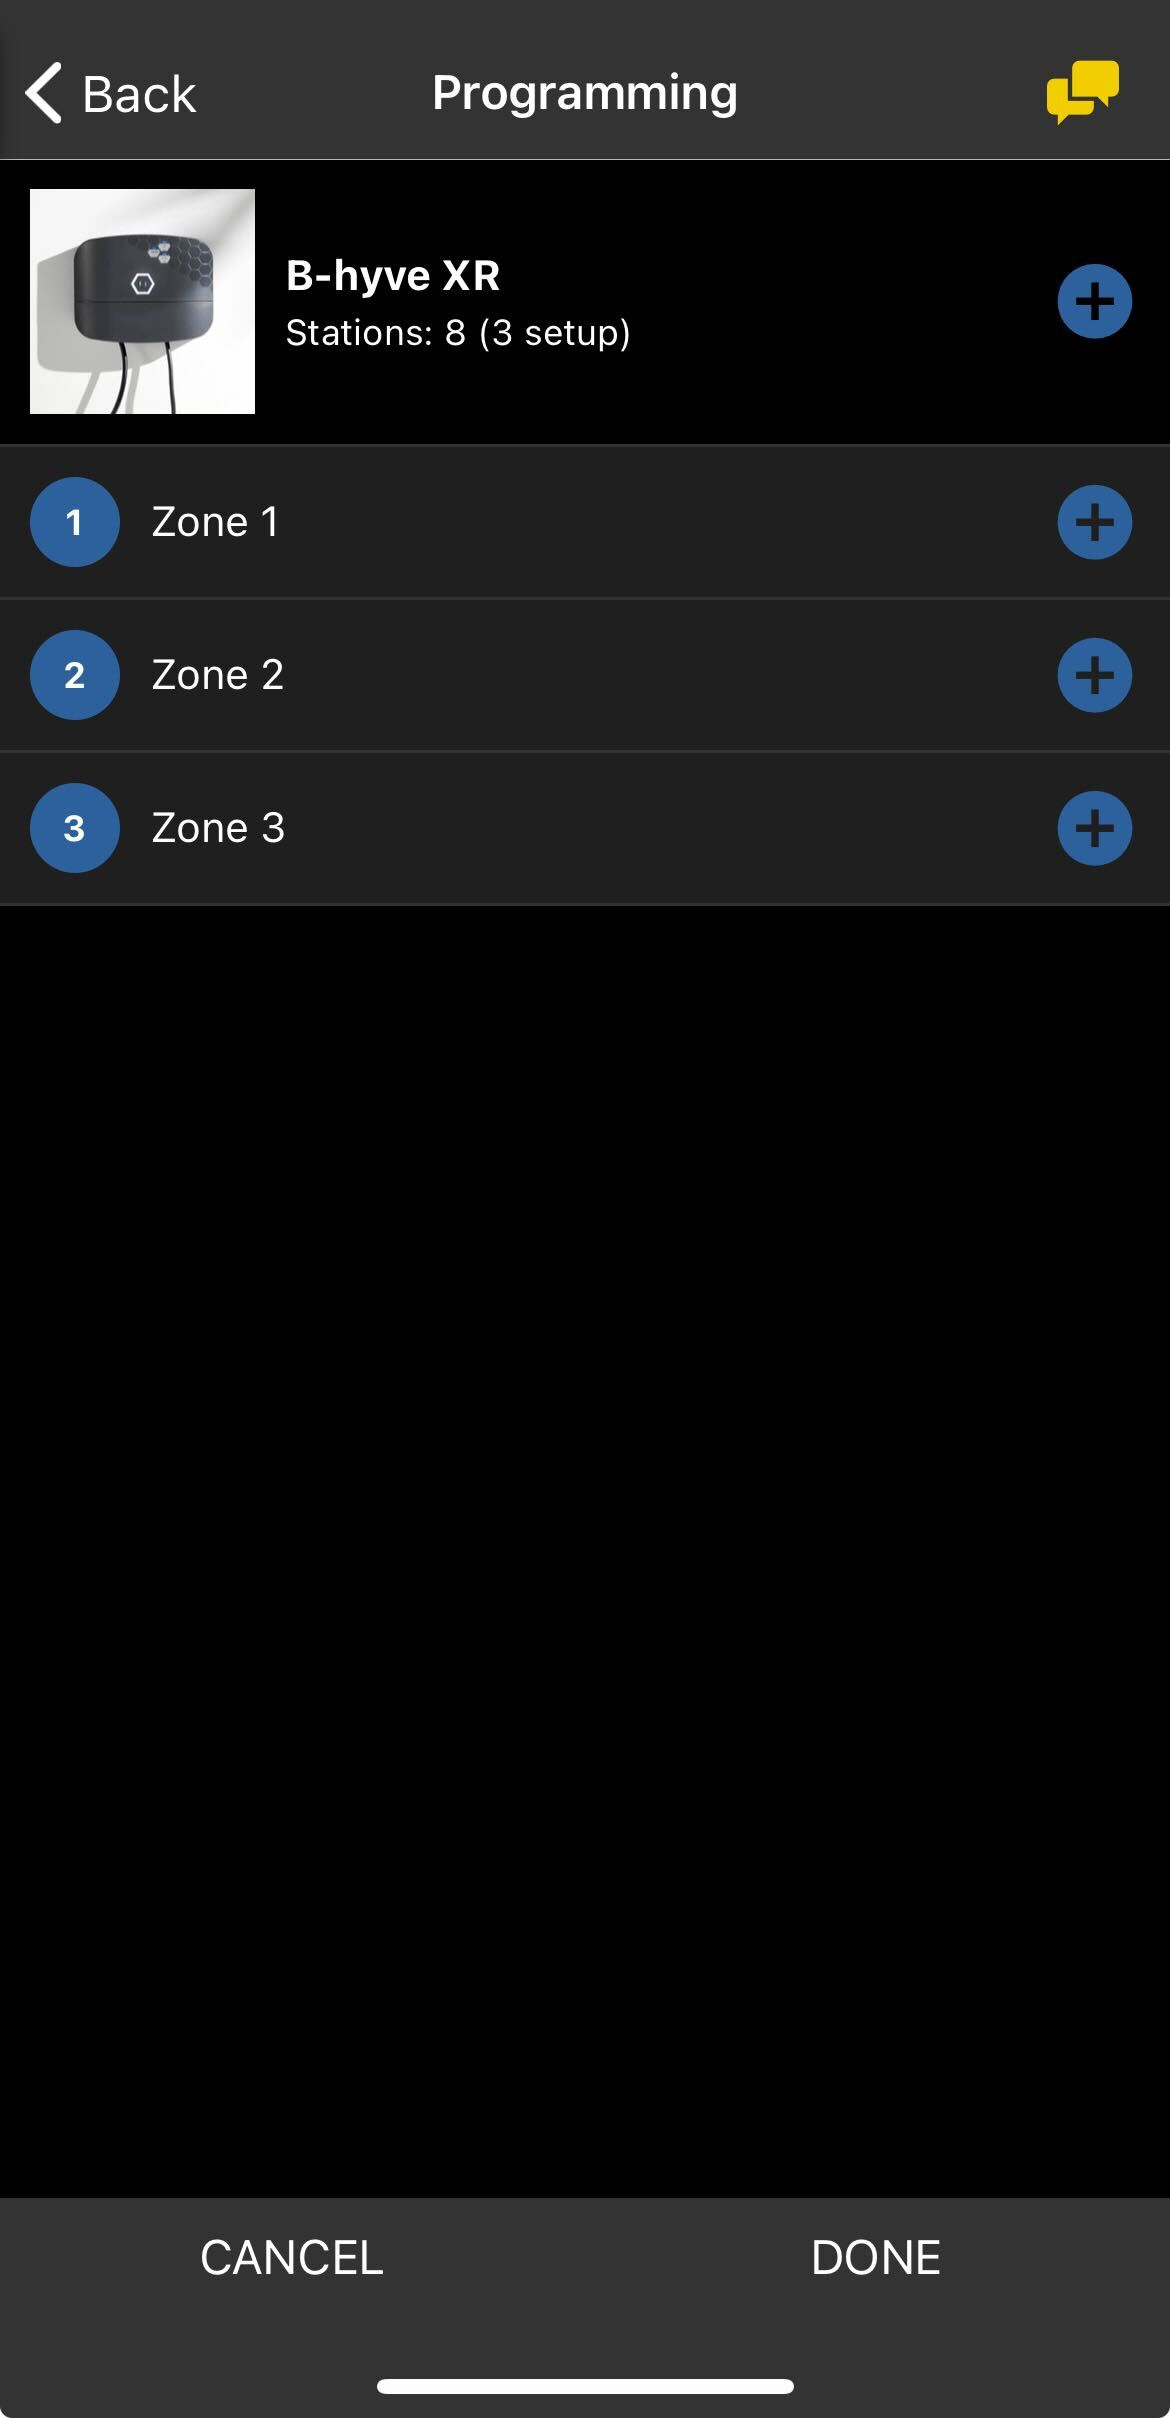
Now you will add the watering Zone(s) you want to be part of this custom program. Press the + button under Zones to select which one(s) to water. Select the Zone, a duration popup will appear.
Set the run duration for the zone by scrolling around the circle. Your timer can be set anywhere from 1 minute to 240 minutes. Once you have your desired run duration, press the green check button. Repeat this process to add as many zones as you want.
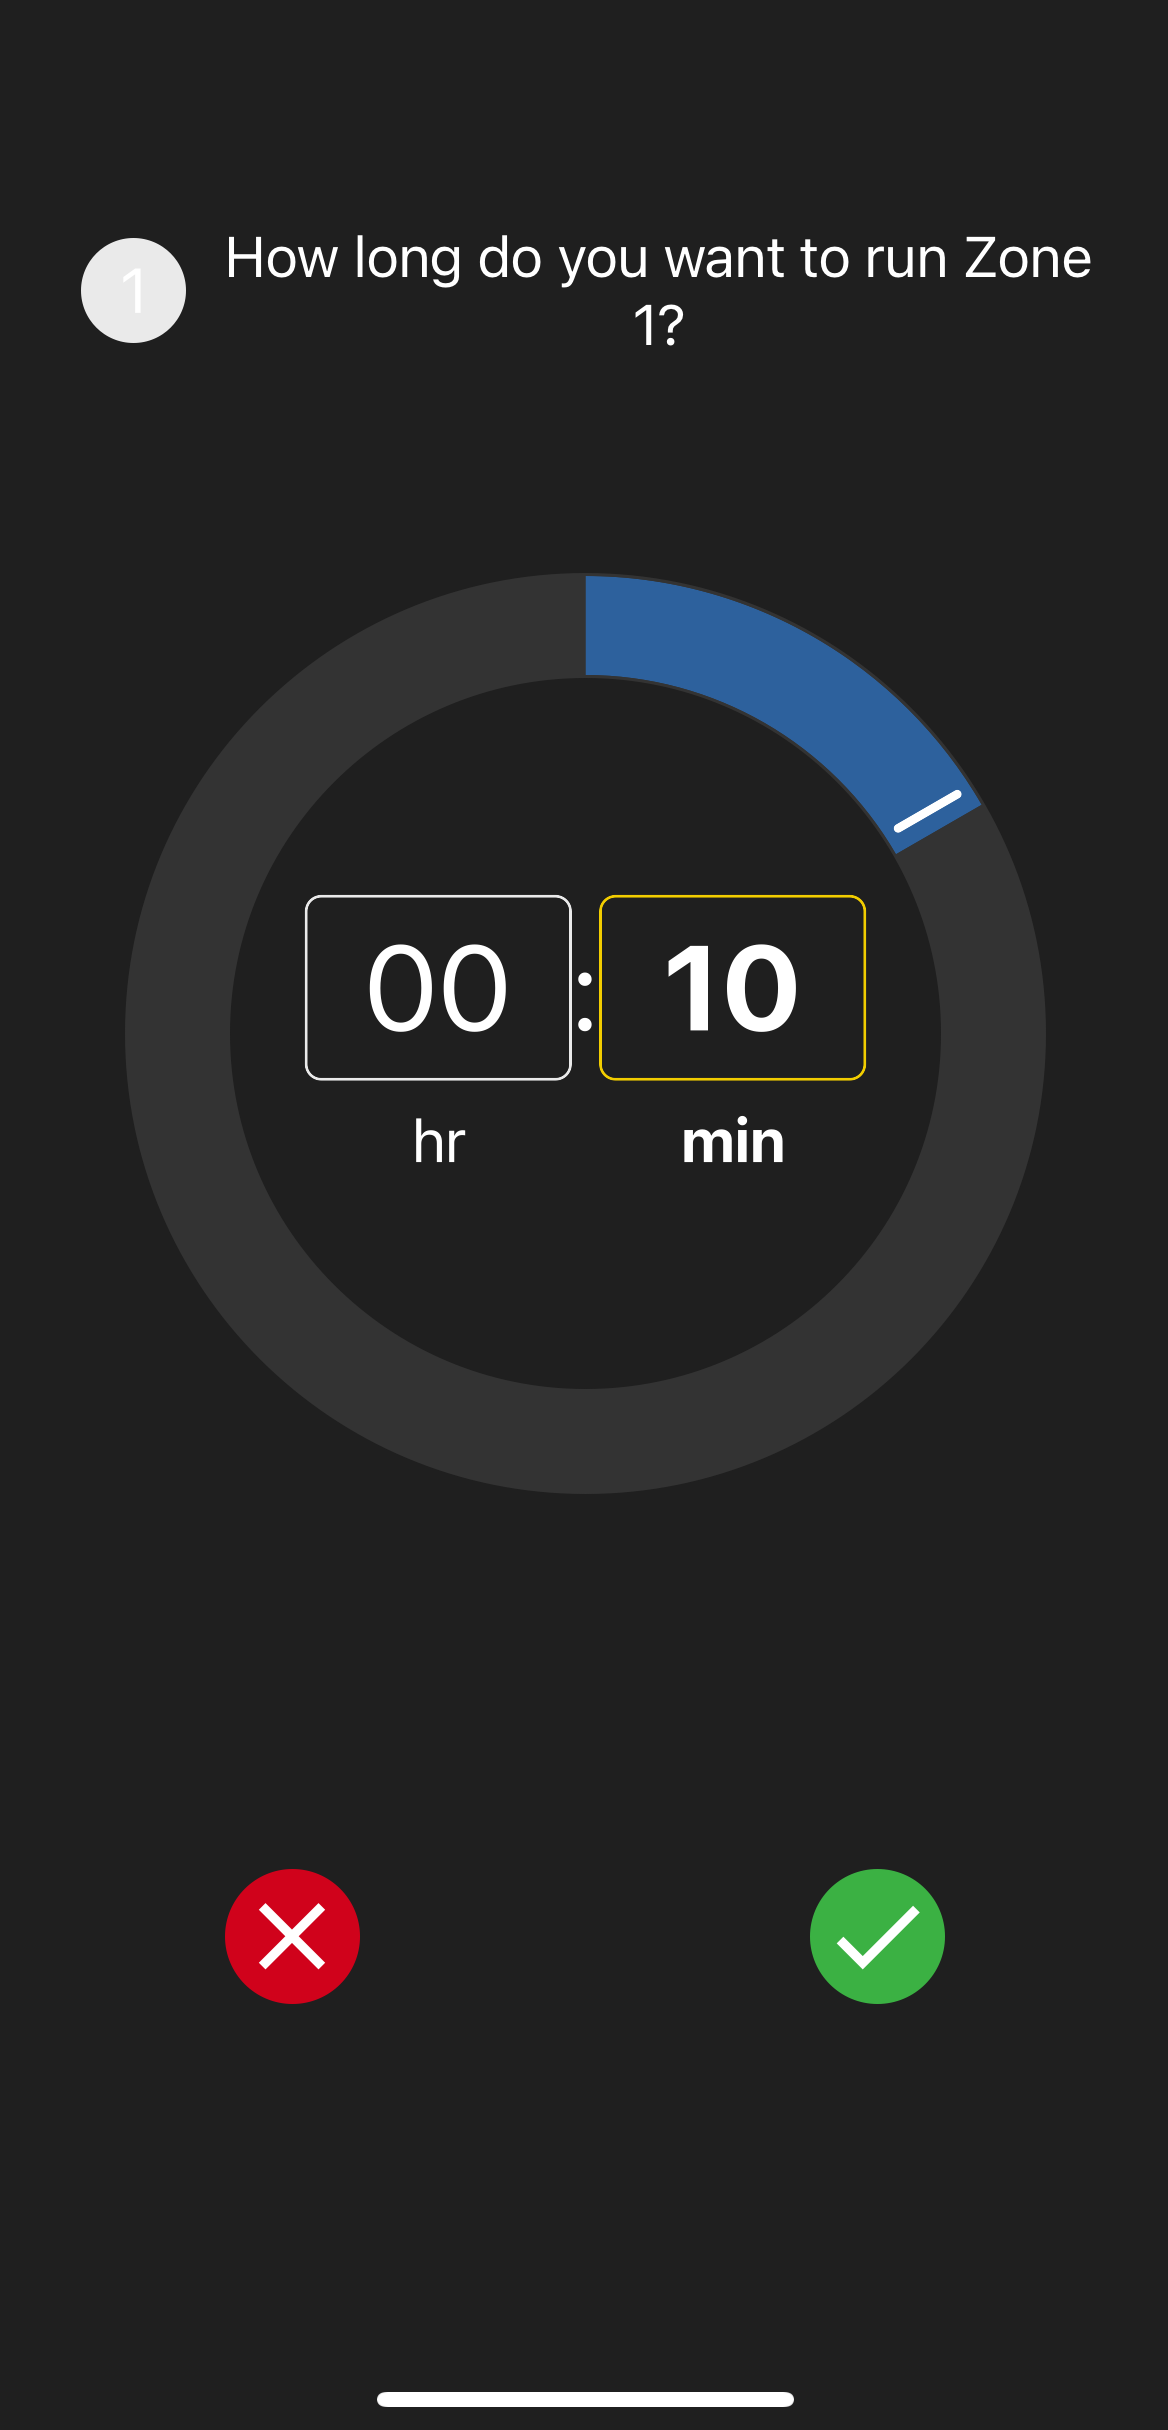
Press the back arrow button in the upper left corner to return to the Custom Program screen. Now you will see a list of selected zones and their run durations listed in the Custom program.
Now we need to tell your timer which days you would like to run. You can select specific days, Even/Odd calendar days, or an Interval of days (every 1 day to every 32 days).
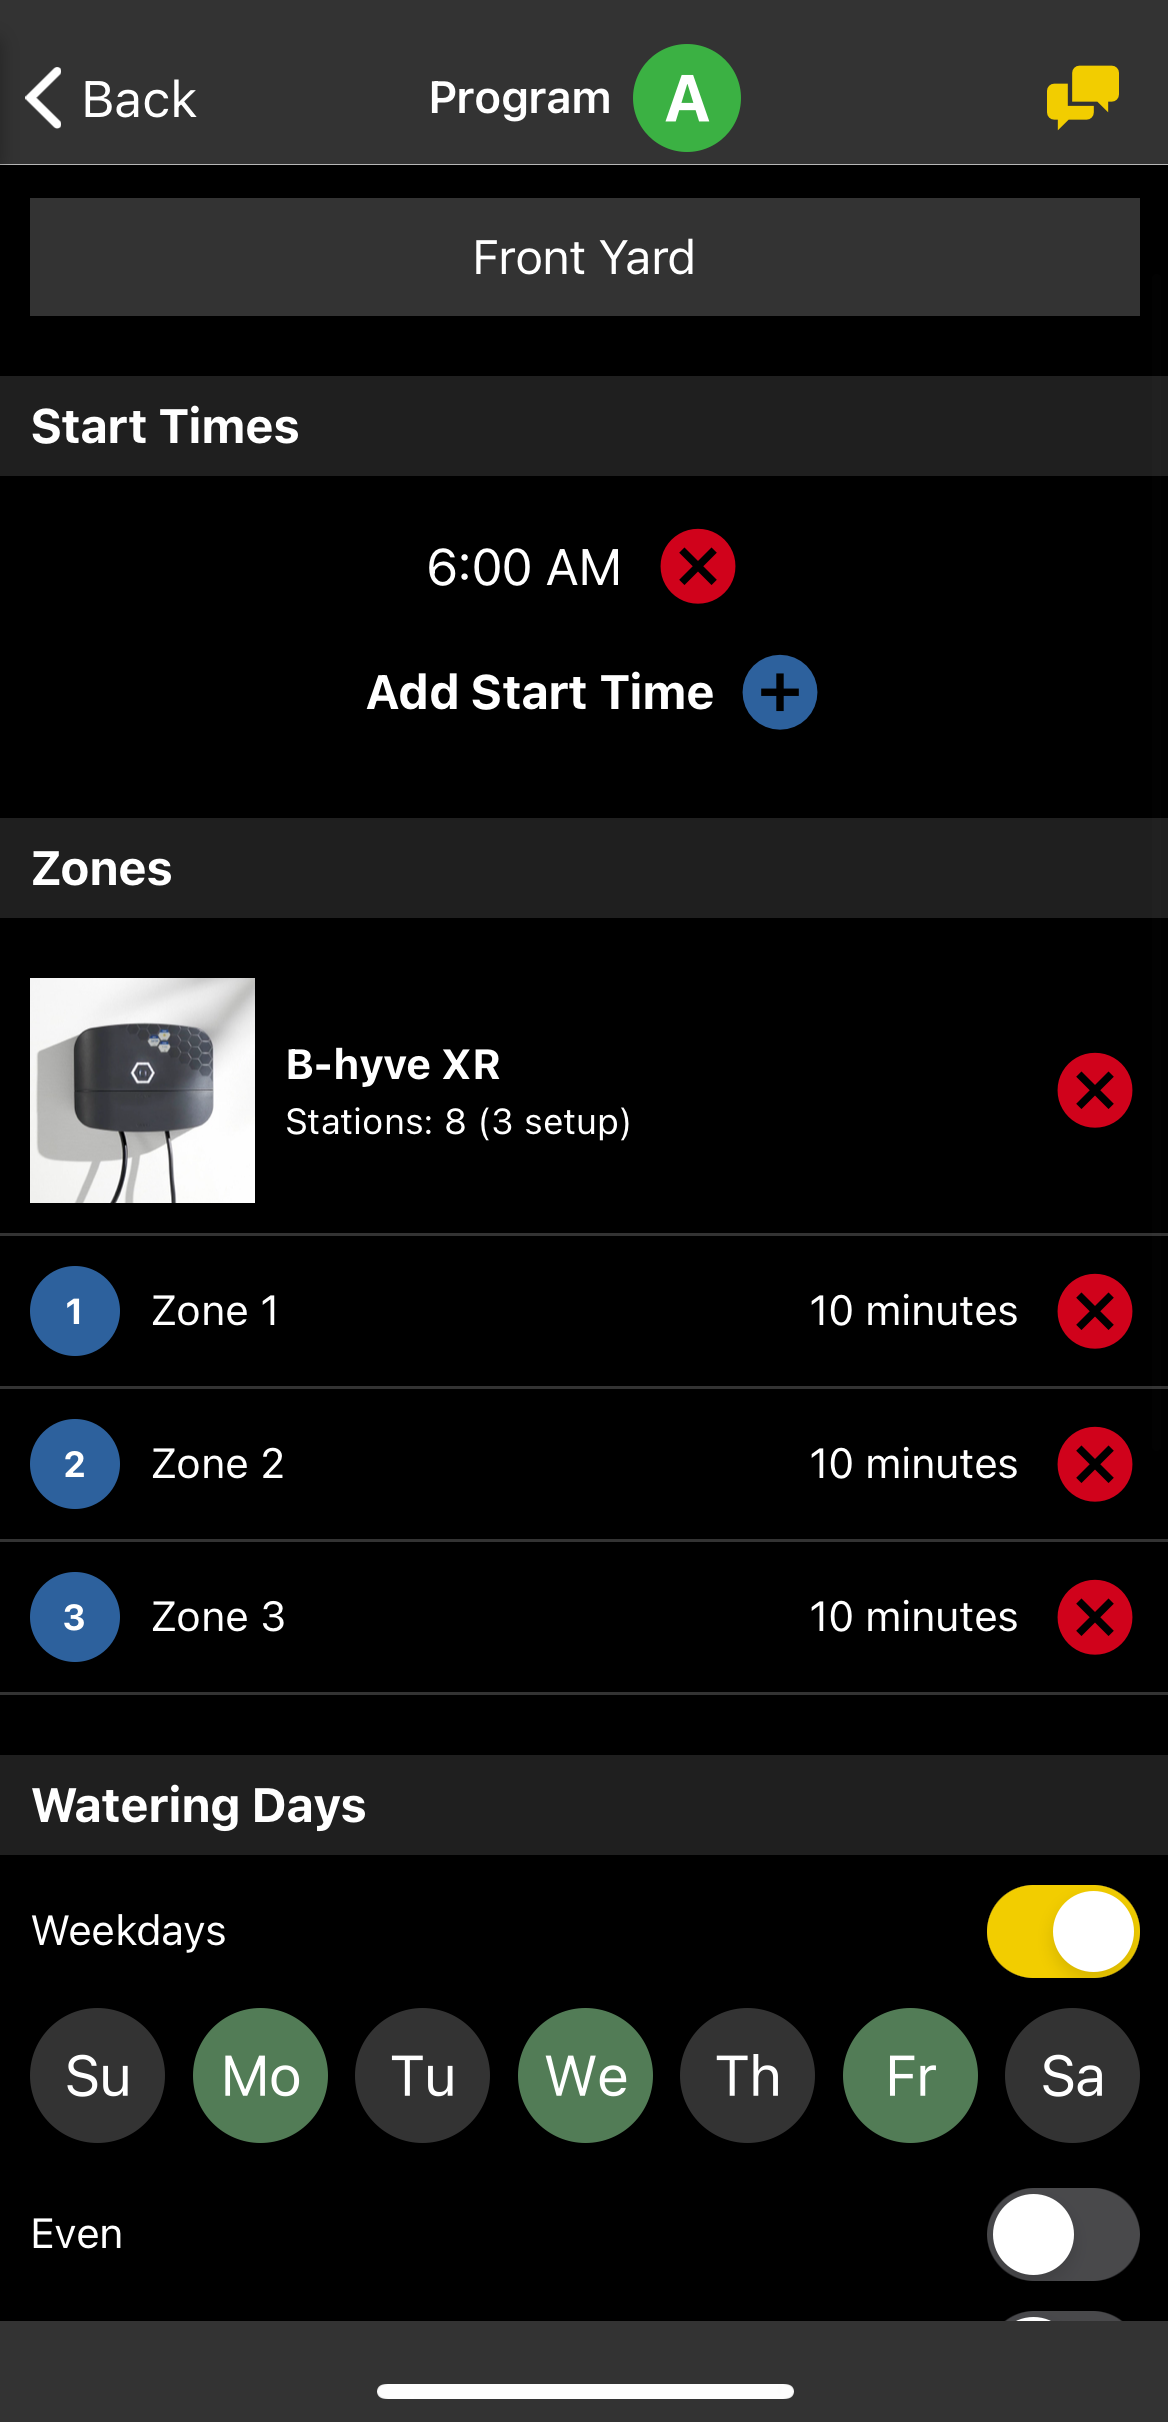
- Weekdays – Weekdays is the default toggle. Tap the days you wish to water to select these days (indicated by the green fill).
- Even/Odd – Tap the slider for the Even days if you wish to water even calendar days (days that end in 2, 4, 6, 8, & 0). Tap Odd to water odd calendar days (days that end in 1, 3, 5, 7, & 9).
- Interval – This is used if you need to water in a specific interval of days (i.e. every 3 days). Tap the slider to select Interval, then use the +/- buttons to increase/decrease the interval. You can also select the Start Date by tapping on the box (see picture).
The watering budget is set to a default of 100%. This means that it will run exactly what you have programmed. Only change this if you wish to run a percentage of your program. This is often used to change your summer program to a winter program.
Now, tap “Save” in the upper right corner to save your changes to this program. The program is now set to run.
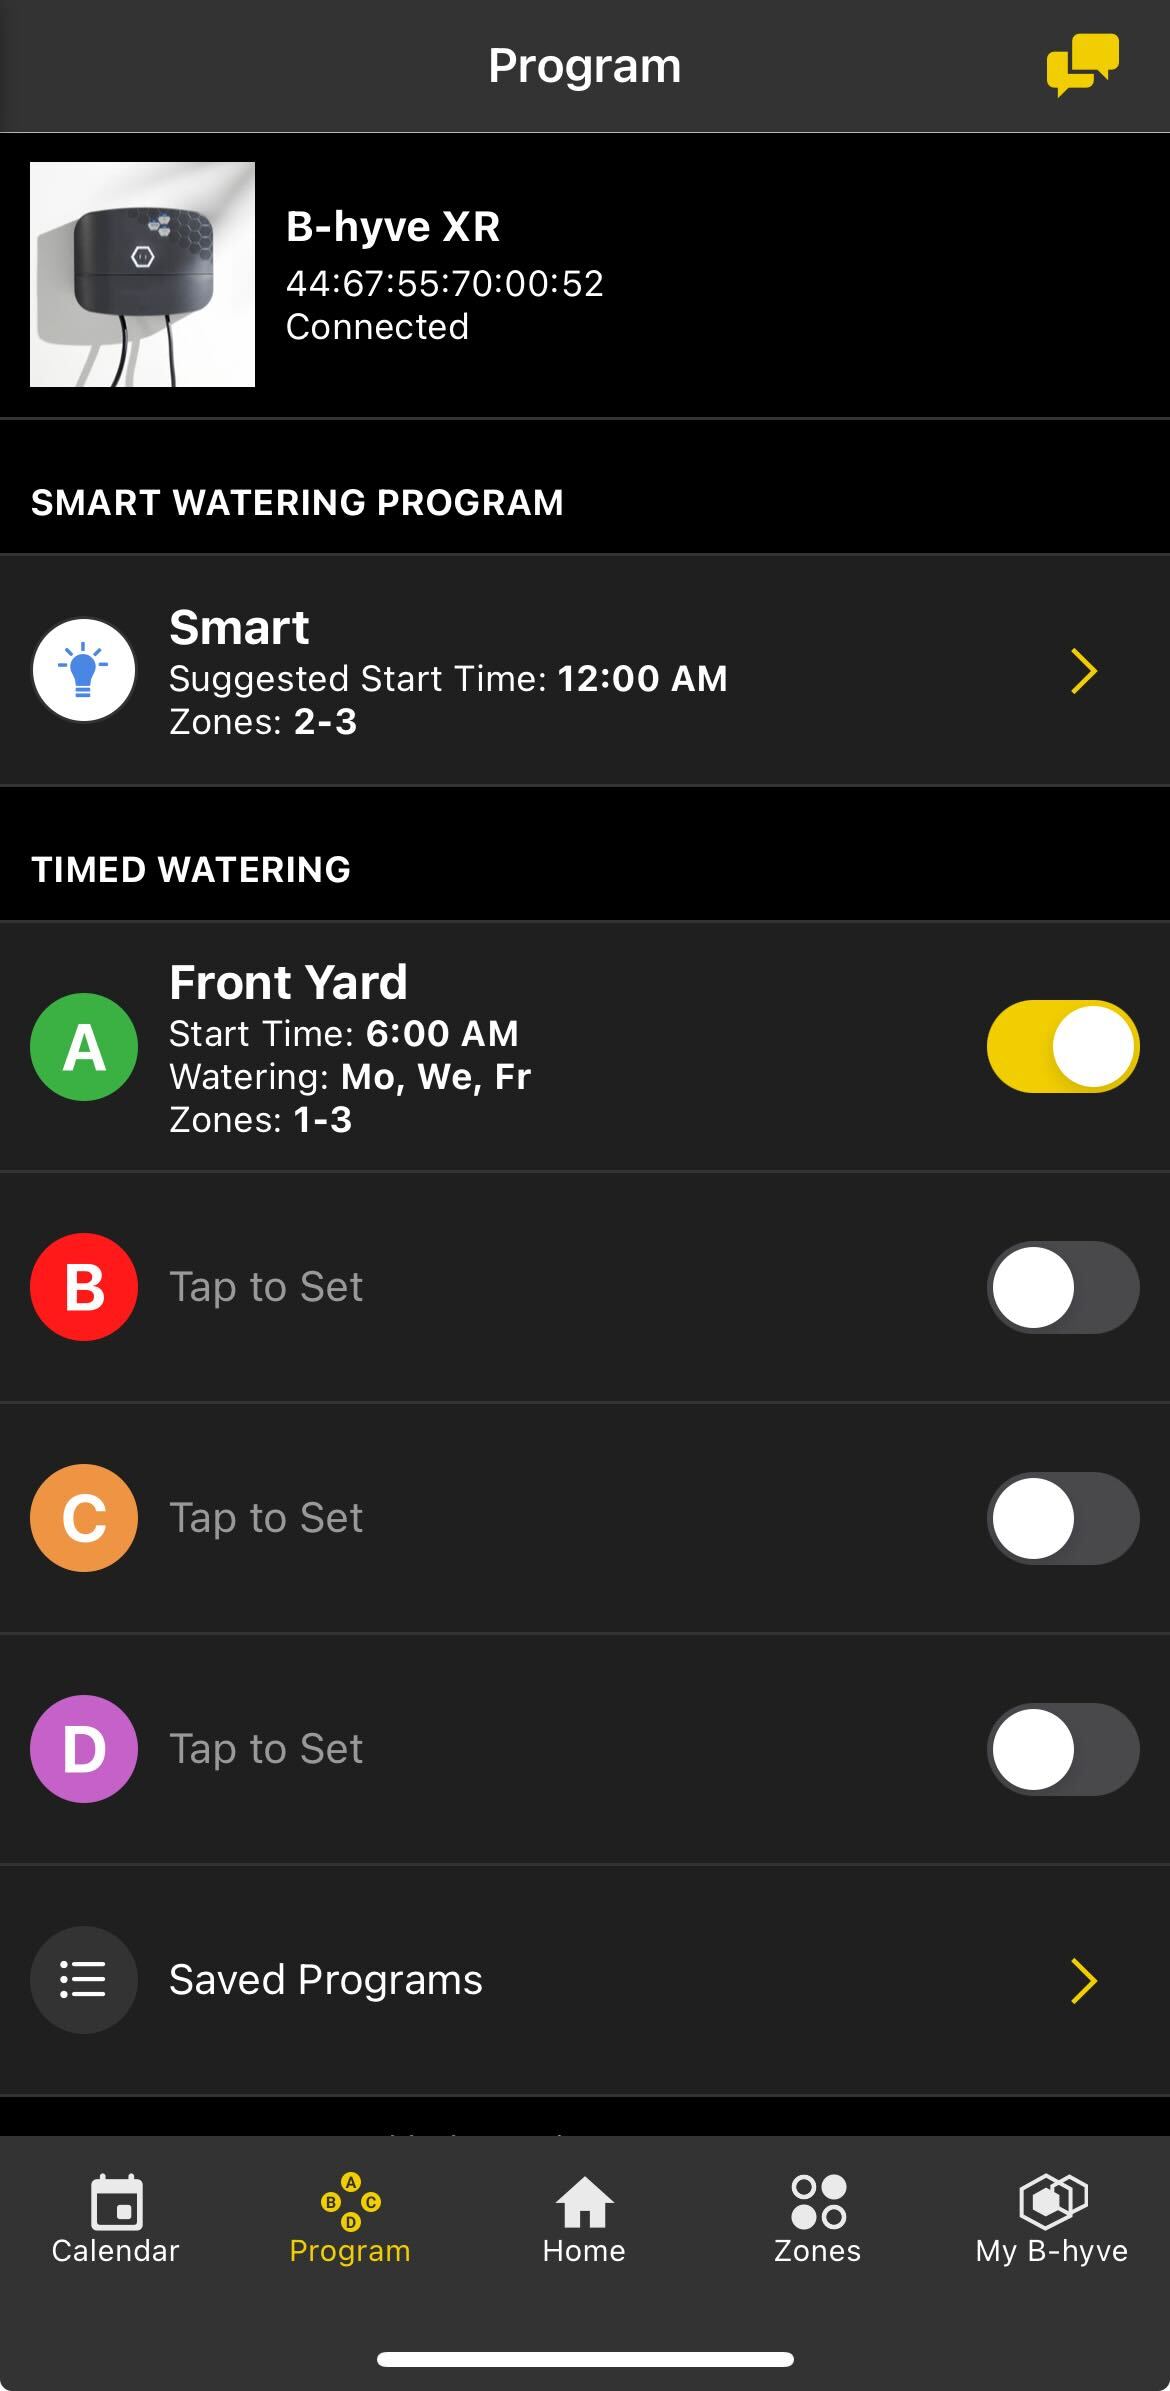
To create another program, do the same as above, but tap on the B, C, or D programs.
Devices Covered: 57985, 57995
Back to Support pageTags: B-hyve, B-hyve App, Indoor/Outdoor, Program, Underground Timer, XR